How to dehydrate pumpkin and winter squash in thin pieces
A whole squash can wait on the shelf; a cut squash cannot. When you decide to dry one, use a measured vegetable process: mature sound flesh, a safe cutting setup, uniform ⅛-inch pieces, a timed blanch, steady airflow, and a tough-to-brittle finish.
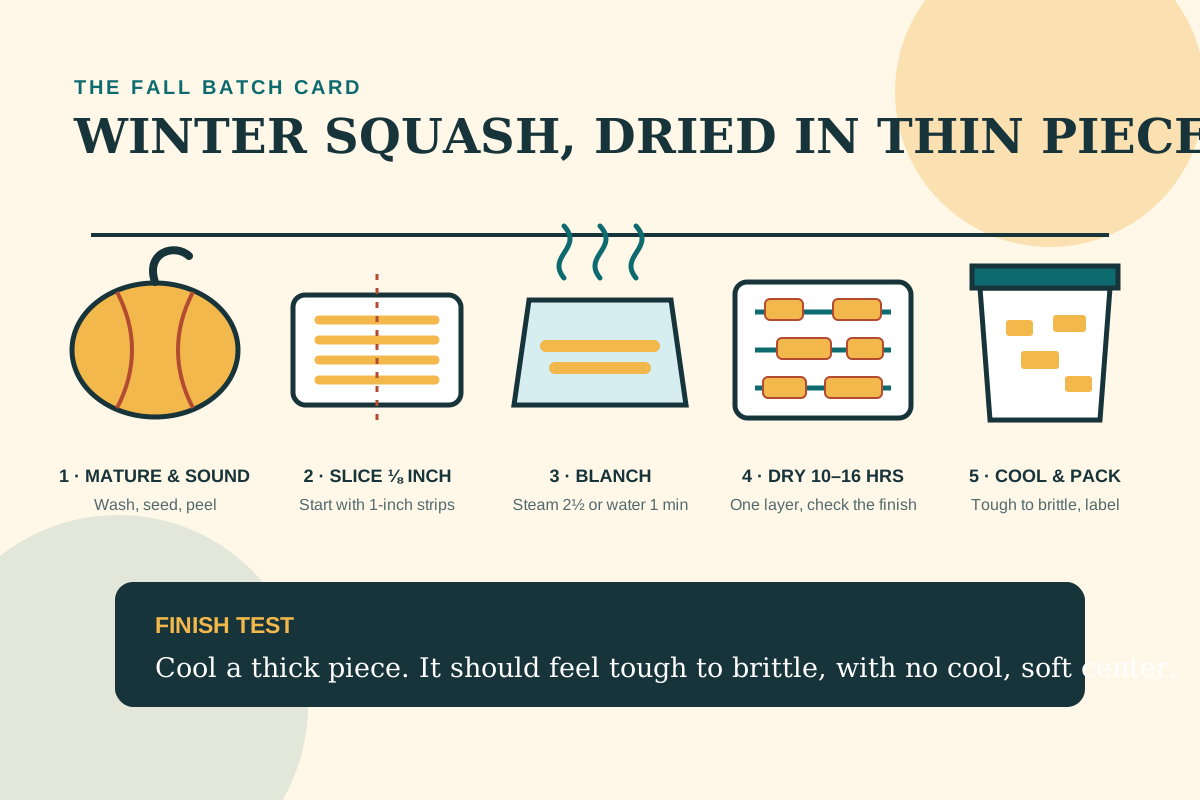
The research-based batch
- Choose mature, sound pumpkin or winter squash and wash the rind.
- Cut safely, remove seeds and cavity pulp, peel, and make 1-inch-wide strips.
- Cut strips crosswise into pieces about ⅛ inch thick.
- Steam blanch 2½ minutes or water blanch 1 minute; cool and drain well.
- Dry in a dehydrator 10 to 16 hours, until tough to brittle after cooling.
- Cool, package airtight, label, and store in a cool, dry, dark place.
October brings two kinds of pumpkin advice into the same search result: ways to use a decorative jack-o’-lantern and ways to preserve dense, mature squash. They are not interchangeable. A carved pumpkin has been cut, handled, and exposed for display. A mature pie pumpkin or winter squash selected for food can become a useful dried ingredient, but only if it begins wholesome and moves through preparation without long warm delays.
This guide follows the thin-piece method published by Penn State Extension for pumpkin and Hubbard squash, supported by general vegetable-drying and blanching guidance from university Extension sources. It does not turn every winter squash variety, puree, spiced mixture, or leftover into the same process. When a source gives a tested form and thickness, keep those details together.
Choose the right squash before choosing a tray
Select a mature pumpkin or winter squash with a firm rind and sound flesh. Penn State describes pie pumpkins as a good food choice because they tend to be less fibrous than large decorative types. Hubbard is specifically named in its drying method. The safest editorial rule is narrow: use a variety covered by a research-based drying direction, or ask a local Extension food-preservation educator before treating another shape, density, or preparation as equivalent.
Reject squash with mold, soft rot, leaking areas, extensive bruising, pest damage, or an off odor. Drying removes water; it does not reverse spoilage or make contaminated produce sound. A hard-to-cut squash with one small surface blemish may still have usable flesh if current Extension guidance supports trimming and prompt cooking, but a drying batch is not the place to salvage questionable material.
Whole winter squash often stores well when intact, cured as appropriate for the variety, and kept under recommended conditions. Drying earns its counter space when a squash has been cut, the pantry needs small soup-ready pieces, freezer space is scarce, or you want to turn a seasonal glut into measured ingredients. If the household mainly bakes with smooth puree, freezing cooked puree may deliver a better texture with less labor.
Wash the rind even though it will be peeled
Wash hands, clean the work surface and tools, and scrub the intact rind under cool running water with a clean vegetable brush. Do not use soap or household detergent on produce. Soil and microorganisms on the outside can move to the flesh on the knife during cutting, so peeling later does not make the first wash optional.
Dry the rind so the squash does not slip. Stabilize it on a sturdy board that will not slide; a damp towel beneath the board can help hold the board in place. Use a sharp, appropriate knife and keep fingers outside the cutting path. Very hard, large, or awkward squash may be safer to divide with a method recommended for that variety or with help from someone comfortable handling it. Do not force a dull blade.
Cut the squash into manageable pieces. Remove the seeds and stringy cavity pulp, then peel away the hard rind. The published drying method calls for peeled flesh. Cut the flesh into strips about 1 inch wide, then cut those strips crosswise into pieces about ⅛ inch thick. A ruler beside the first few pieces is more useful than guessing; uniform thickness matters more than decorative shapes.
Why ⅛ inch is a process detail, not a styling choice
Moisture must move from the center of each piece to the surface and then into the drying air. A piece twice as thick does not simply need a few extra minutes. It creates a much longer path from center to surface, and a batch with mixed thicknesses produces mixed endpoints. Thin edges can become hard while a thick center remains soft and damp.
Keep the pieces close in thickness, even if their outlines differ. Set aside thick end pieces for a cooked meal rather than adding them to the tray. If the flesh crumbles under the knife or the slices vary wildly, stop and correct the cutting setup before heating water. A mandoline can make even slices, but only when its guard, food holder, and instructions are used; winter squash is hard and awkward, so a mandoline is not automatically the safer tool.
Do not substitute cubes from a canning recipe. Canning and drying solve different heat-and-moisture problems. Research-tested pressure-canning directions require pumpkin and winter squash in cubes, while the drying direction uses very thin pieces. The existence of one safe form does not validate it in another process.
Blanch the pieces before drying
Penn State’s winter-squash method gives two choices: steam blanch for 2½ minutes or water blanch for 1 minute. Blanching is a timed heat treatment, not a quick rinse and not full cooking. University of Minnesota Extension explains that blanching improves the safety and quality of dried vegetables by reducing surface microorganisms and deactivating enzymes that affect color, flavor, and texture.
Steam blanch
Arrange a small amount in a single layer so steam reaches the surfaces. When active steam surrounds the covered basket, time 2½ minutes.
Water blanch
Use enough boiling water for a small batch and maintain the boil. Follow the specific 1-minute winter-squash direction.
Cool and drain
Cool promptly in cold water, then drain thoroughly and remove surface water before loading trays.
Prepare only as much as the blancher and dehydrator can handle promptly. Crowding can slow heating, and leaving cut pieces on the counter while several rounds wait works against a controlled batch. For water blanching, the water should return to a boil quickly; if it does not, reduce the amount in the next batch. Replace blanching water as needed rather than letting it become a thick squash broth.
Cool immediately after the timed blanch so the pieces do not continue cooking into mush. Swirl them in cold water or use cold running water, drain, and spread them on clean towels or a perforated surface. Surface water adds needless drying time. Pat carefully without contaminating the pieces or compressing them into a wet pile.
Load one layer and keep the air moving
Arrange drained pieces in a single layer on clean dehydrator trays. Pieces should not overlap or form wet stacks. Small gaps let warm, dry air reach more surface. Follow the dehydrator manual for tray capacity, temperature, rotation, liners, and the room where the machine may safely operate.
Penn State gives a drying-time range of 10 to 16 hours for thin pumpkin or Hubbard squash pieces. Treat this as an inspection window, not an appointment. Variety, initial moisture, actual thickness, blanching, room humidity, load size, dehydrator design, and tray position can all change the finish time. Colorado State describes successful drying as a balance of enough heat, dry air, and circulation; too little heat can leave food in a poor drying range, while excessive heat can harden the surface and slow moisture escaping from within.
Use the temperature specified by the complete research-based vegetable method and your dehydrator manual. General Extension guidance commonly places vegetable drying near 140°F, but the correct setting belongs with the exact method and machine. Do not assume the low herb setting from the herb guide or the heat process in the jerky guide applies to squash.
If the manual calls for rotating trays, do it on schedule. In a horizontal-airflow model, still compare pieces near the fan and door. In a stacked vertical-airflow model, note which trays sit closest to the heater. Record the start time, set temperature, tray count, approximate fresh weight, and the first check. Those notes turn one successful batch into a repeatable process.
Test cooled pieces from several tray positions
The finished texture is “tough to brittle.” Those words allow some variation between varieties and slice shapes, but they exclude a soft, cool, moist center. Take representative pieces from thick and thin areas and from more than one tray. Let samples cool before judging; warm food can feel softer than it will at room temperature and may hide the difference between flexible and damp.
- Choose pieces from the center and edge of at least two trays.
- Cool the samples to room temperature.
- Bend and tear them. They should feel tough to brittle, not soft or juicy.
- Look at the thickest center. It should show no wet or dark moisture pocket.
- Return unfinished pieces to the dehydrator and recheck in shorter intervals.
- Remove completed pieces if the machine and handling method allow safe staggered unloading.
A rigid surface alone is not proof of a dry center. Case hardening can occur when the outside dries too quickly. If thick pieces have a hard shell and soft inside, review slice thickness, temperature, load, airflow, and tray rotation. Grinding a questionable piece into powder only hides the evidence; it does not finish the drying.
Food scorches more easily near the end, so inspections should become more frequent as the batch approaches the finish. Do not leave a nearly finished vegetable load unattended for an extended period. If a batch smells scorched, shows unusual discoloration, or stayed warm and moist because the dehydrator stopped, do not guess about shelf stability.
Cool promptly, then decide whether the lot needs conditioning
Spread completed pieces so they cool without trapping steam. Package only after they reach room temperature; warm food in a closed jar can create condensation. Do not leave the dried pieces exposed for hours in a humid kitchen, because they can absorb moisture again.
Colorado State explains that dried vegetables may finish with small moisture differences because pieces and tray positions vary. Its conditioning option is to place cooled vegetables in a large food-safe glass or plastic container about two-thirds full, cover lightly, and keep it in a warm, dry, well-ventilated place for four to ten days, stirring or shaking daily. If moisture beads appear, return the food to the dehydrator, dry further, cool, and restart the check. The same source notes that conditioning is not always necessary because vegetables are dried to a nearly waterless state.
Use conditioning as a quality-control step, not a way to make an underdried batch safe by waiting. Every piece should first meet the tough-to-brittle finish. If you choose to condition, label the container, protect it from pests, and inspect it every day. Any mold or off odor means discard the affected lot rather than tasting or picking around it.
Package for the amount you will actually use
Pack cooled, dry pieces in clean, dry, moisture-resistant airtight containers. Smaller portions reduce repeated exposure to humid air. A clear jar makes inspection easy, but store it away from light. Label the product, variety, preparation, drying date, batch number, and intended use. Keep containers in a cool, dry, dark place away from the stove, dishwasher, sink, and sunny windows.
Colorado State recommends using dried vegetables within about a year for best nutrient retention and quality. That is a quality target, not a license to ignore the container. Check for condensation, clumping, flexible pieces that were previously brittle, insect activity, mold, or an off smell. Discard a questionable container without tasting.
Powder is convenient, but grinding increases surface area and exposure to air and humidity. Keep most pieces intact and grind only a small working amount after confirming they are fully dry. Use a clean, dry grinder, let the motor cool between short pulses, allow dust to settle before opening, and protect eyes and lungs from airborne powder. A clumped powder is a moisture warning, not something to break up and return to the shelf.
Rehydrate for cooked dishes, then refrigerate leftovers
Dried winter squash is best treated as an ingredient for cooked soups, stews, sauces, and purees rather than a ready-to-eat copy of roasted squash. Rehydrate pieces in clean water, then cook until the texture suits the recipe. Using the soaking liquid in soup can retain flavor and nutrients that moved into the water, provided the full dish is cooked and handled safely.
Start with a small measured test: weigh or measure dry pieces, add a recorded amount of water, note the time, then assess the result in the actual recipe. Dense pieces may soften differently by variety. Do not promise that one cup of dried squash will equal a fixed volume of canned puree without testing your own batch and recipe.
| Use | Best preparation | What to record |
|---|---|---|
| Soup or stew | Add pieces early enough to hydrate and cook fully | Dry weight, liquid added, simmer time |
| Pureed soup | Rehydrate and cook until soft, then blend | Final yield and thickness |
| Sauce or filling | Cook rehydrated pieces, drain only if the recipe needs it | Absorbed water and seasoning |
| Powder | Grind fully dried pieces in small batches | Grind date and tablespoon yield |
Once water is added, the food is no longer shelf-stable simply because it began dry. Cook or refrigerate promptly and use normal leftover guidance. Do not leave rehydrated squash soaking at room temperature for an open-ended period.
Keep puree, leather, and canning in separate lanes
Readers often ask whether they can roast a pumpkin, blend it, spread it on a tray, and use the slice schedule. That changes the food’s thickness, density, airflow, and formulation. If you want pumpkin or vegetable leather, use a current tested recipe that specifies ingredients, tray depth, temperature, endpoint, and storage. Do not translate a thin-slice method into puree by intuition.
Freezing is a practical option for cooked pumpkin or winter-squash puree. Cool it promptly, portion it for the recipes you use, label it, and follow current freezing guidance. This can preserve the smooth texture wanted for breads, pies, and soups more directly than drying.
Canning has another set of rules. Research-based home-canning guidance permits cubed pumpkin or winter squash in a pressure canner under a tested process; mashed or pureed pumpkin is not included. Never use the drying directions as evidence for a canning method, and never use a canning jar seal as a substitute for a properly dried product.
Use a batch log to find the real bottleneck
| Record | Why it matters |
|---|---|
| Variety, source, and whole weight | Connects density and yield with the starting squash |
| Trimmed weight and slice thickness | Shows preparation loss and whether pieces were uniform |
| Blanch method, batch size, and time | Confirms the pretreatment was controlled |
| Set temperature and room conditions | Explains changes in drying speed |
| Tray positions and rotation | Reveals hot or slow zones in the machine |
| Check times and finish texture | Prevents the next batch from relying on one timer |
| Final dry weight and package count | Improves planning for storage and recipes |
| Rehydration ratio and recipe result | Turns dried pieces into a useful ingredient |
Penn State estimates that about 11 pounds of pumpkin may yield roughly ¾ pound of dried product, or about 3½ pints. Treat that as planning context, not a guaranteed home yield. Variety, trimming, maturity, slice size, and final dryness all matter. Weighing your own batch provides the number your pantry needs.
The most useful upgrade is often not another appliance. It may be a ruler, a sharper safe knife, a second blanching basket, a tray map, or a jar sized for one recipe. Change one variable at a time and keep the result. That is how a bright fall experiment becomes a dependable pantry method.
Winter-squash drying questions
Do I have to peel the squash?
Yes for the published thin-piece method used here. Wash the rind first, remove seeds and cavity pulp, peel, make 1-inch strips, and cut the strips crosswise about ⅛ inch thick.
Can I skip blanching if the squash looks clean?
No. Clean appearance does not replace the timed pretreatment. Blanching reduces microorganisms and slows enzyme-driven quality changes. Use the specified steam or water method.
Why is the time range so wide?
Moisture, thickness, load, airflow, room humidity, machine design, and tray position all change drying time. Start checking within the research-based range and judge cooled pieces by the finish test.
Should dried squash snap?
The published endpoint is tough to brittle, so every piece may not make the same sharp snap. It should not have a soft, cool, wet, or flexible center after cooling.
Can I use this method for butternut, acorn, kabocha, or spaghetti squash?
The cited Penn State drying direction specifically identifies pumpkin and Hubbard squash. Varieties differ in density and structure. Ask a local Extension food-preservation specialist for a research-based method rather than silently substituting another variety.
Sources and review notes
This guide was researched and reviewed October 19, 2026. Selection, preparation, blanching, drying range, finish, storage, and use guidance was checked against:
- Penn State Extension — Let's Preserve: Squash and Pumpkins.
- University of Minnesota Extension — Preserving Food at Home: Blanching Vegetables, reviewed 2025.
- University of Minnesota Extension — Preserving Food at Home: Drying.
- Colorado State University Extension — Drying Vegetables.
- Penn State Extension — Pumpkins and Winter Squash in the Garden and the Kitchen.
Follow the complete current method and your dehydrator manual. Public discussions were reviewed to identify recurring questions about puree, blanching, doneness, powder, decorative pumpkins, and variety substitutions; instructions were resolved against Extension sources rather than anecdotes.